
Showing posts with label Green Living. Show all posts
Showing posts with label Green Living. Show all posts
Tuesday, December 20


Friday, December 2
Keep Your Containers! Plus a Look at the New Year!

Keep Your Containers! Plus a Look at the New Year!
Just a reminder to keep your 2oz containers! In the new year, all plastic 2oz, 4oz, and 8oz jars will be replaced by 4oz biodegradable jars. This means that all the facial creams, scrubs, and body butters will come in jars that are the same size as the current body butter jars. So why keep your plastic containers? If you prefer to continue to use plastic containers, or don't think you'll go through 4oz of facial cream in 6 months, then you'll love that I'll be offering refill packs in biodegradable bags - these will be a bit cheaper as the packaging cost will be reduced and I'm hoping that they will be flat enough to qualify for a shipping discount with Canada Post! Also, please note that the current recycling program will be discontinued and replaced with a program that will still offer discounts for packaging that is returned that we can reuse. I'll announce all the details in the new year :)
Friday, November 25
2 Ingredients to Watch for Under Your Christmas Tree!
 Today I was reminded of why I started making skin care products - even the "natural" companies, aren't living up to their promises! In my mailbox today I found a newsletter (more like a newsPAPER!) from one of the biggest commercial companies toting the natural vibe. Now although this big company (that starts with an "L" and ends in an "H"), makes products that are better than a lot of what's available out there, they are still using two ingredients (in the majority their products) that are on most "dirty dozen" lists of ingredients to avoid.
 I previously talked in length about one of those ingredients, parabens, in a previous blog post. A summery of their danger is that they mimic hormones and are readily absorbed into our skin. You'll find these at the end of the "Big L's" ingredients lists for many of their products.
The second shameful ingredient that the big L adds to pretty much anything that bubbles, suds, or fizzes, is SLS (Sodium Lauryl Sulfate). I'm sure I've mentioned this problem ingredient on many occasions but since I don't have a blog post summarizing what it is and why you'll want to avoid it, now is the time! The last thing we all want is to start a new year bathing and soaking in chemicals! Without further a do, here's what makes SLS so shameful!
Share
What Sodium Lauryl Sulfate (SLS) and Sodium Laureth Sulfate (SLES) are:
They are forming agents in the most basic terms. They create bubbles, form, and clean. They are some of the most widely used sulfates because they cheap. The almighty dollar strikes again. You'll find these sulfates in all kinds of bath and body products including bath bombs (the big L is notorious for SLS in their bath bombs), shampoo, body wash, bubble bars (I've never seen one made without SLS or SLES), tooth paste, dish soap, bubble bath, shaving cream, etc. SLES is said to be the milder of the two, but its effects seem to be much more long lasting.
Why they should be avoided:
- Concentrations as low as 0.5% can cause irritation.
- Concentrations of 10-30% can cause skin corrosion!
- Rashes, scalp scabs, canker sores, dry skin patches
- Color stripping
- Stripes shine from hair
- Penetrates skin easily and can't be metabolized by our liver
- Possible endocrine disruptors
- Not just skin and scalp irritants, they are also eye irritants
- Contamination with 1,4 dioxane (cancer causing)
How to spot them on labels:
They will be listed exactly how I've listed them in this post (minus the abbreviation):
- Sodium Lauryl Sulfate
- Sodium Laureth Sulfate
Today's take away:
Read labels! It's the only way to see through marketing hype to know if you're getting a natural, safe, skin loving product, or you're getting something that seems wondering but actually contains cancer causing ingredients! Again, watch out for any ingredient ending in -paraben, and watch out for Sodium Lauryl Sulfate and Sodium Laureth Sulfate
Wednesday, November 16
My Wedding Skin Care Routine

I have had SO many requests wanting to know what "Batty did to get ready for her big day"! One of the questions I've been getting the most is my skin care routine. Although I didn't change it up TOO much from my normal routine, I did increase the amount of clay masks and quick stick applications I did. Below is a breakdown of my routine 10 days before the wedding! I want to stress that the routine I decided to do was with MY skin in mind. I wouldn't suggest it for everyone as we all have skin that is at different stages, has different "problem areas", etc. I'm open to putting together a personalized routine for any brides (or anyone else!) out there who would like one! Contact me for more details (jamiesabot AT gmail DOT com). Now on with the "Batty as a Bride" routine! ;)
Here's the products I used:
Exfoliating Bath Glove
Here's the routine I followed:
Thursday October 6 - TIME TO GET SERIOUS!
When I got up:Before I went to bed:
- Washed with black charcoal cold press soap.
- Applied Facial Primer/Day Moistuizer.
- Washed with tea tree facials scrub.
- Applied Patchouli Moisturizer.
- Waited 30 minutes, then applied dry clay mask with kabuki brush (went to bed with clay mask ON!)
Friday October 7, Saturday October 8, & Sunday October 9 - CLAY DAYS {DETOX}
When I got up:Before I went to bed:
- Washed face thoroughly with unscented facial scrub (read: washed off clay mask).
- Followed up with a light washing of black charcoal cold press soap, and exfoliating bath glove in any areas that needed it (usually around my nose)
- Applied quick stick acne fix on any blemishes
- Applied Facial Primer/Day Moistuizer.
- Washed with black charcoal cold press soap.
- Applied Patchouli Moisturizer.
- Waited 30 minutes, then applied dry clay mask with kabuki brush (went to bed with clay mask ON!)
Monday October 10 - DEALING AFTER DETOX
When I got up:Before I went to bed:
- Washed face thoroughly with unscented facial scrub (read: washed off clay mask).
- Followed up with a light washing of black charcoal cold press soap, and exfoliating bath glove in any areas that needed it (usually around my nose)
- Applied quick stick acne fix on any blemishes
- Applied Facial Primer/Day Moistuizer.
- Washed with black charcoal cold press soap.
- Applied quick stick acne fix on any blemishes
- Applied Patchouli Moisturizer.
Tuesday October 11 - DEALING WITH DETOX PART 2
When I got up:Before I went to bed:
- Washed with tea tree facial scrub
- Applied quick stick acne fix on any blemishes
- Applied Facial Primer/Day Moistuizer.
- Wash with tea tree facial scrub and followed up with a light washing of black charcoal cold press soap.
- Applied Patchouli Moisturizer.
- Applied quick stick acne fix ALL OVER.
Wednesday October 12 - ROUND 2 OF CLAY DAYS
When I got up:Before I went to bed:
- Washed face thoroughly with tea tree facial scrub
- Applied Facial Primer/Day Moistuizer.
- Washed with black charcoal cold press soap.
- Applied Patchouli Moisturizer.
- Waited 30 minutes, then applied dry clay mask with kabuki brush (went to bed with clay mask ON!)
Thursday October 13 - DEALING WITH DETOX
When I got up:Before I went to bed:
- Washed face thoroughly with unscented facial scrub (read: washed off clay mask).
- Followed up with a light washing of black charcoal cold press soap, and exfoliating bath glove in any areas that needed it (usually around my nose)
- Applied quick stick acne fix on any blemishes
- Applied Facial Primer/Day Moistuizer.
- Washed with black charcoal cold press soap.
- Applied Patchouli Moisturizer.
- Waited 30 minutes, then applied dry clay mask with kabuki brush (went to bed with clay mask ON!)
Friday October 14 - STARTING TO FOCUS ON CALMING
When I got up:Before I went to bed:
- Washed face thoroughly with unscented facial scrub (read: washed off clay mask).
- Followed up with a light washing of black charcoal cold press soap
- Applied quick stick acne fix on any blemishes
- Applied Facial Primer/Day Moistuizer.
- Washed with black charcoal cold press soap.
- Applied quick stick acne fix on any blemishes
- Applied Patchouli Moisturizer.
Saturday October 15 - CALMING IS A MUST
When I got up:Before I went to bed:
- Washed face with mild unscented jojoba facial scrub
- Followed up with exfoliating bath glove in any areas that needed it (the last few days, I haven't needed this much)
- Applied quick stick acne fix on any blemishes
- Applied Facial Primer/Day Moistuizer.
- Washed with black charcoal cold press soap.
- Applied quick stick acne fix on any blemishes
- Applied Facial Primer/Day Moisturizer
Sunday October 16 - THE BIG DAY
When I got up:
- Washed with mild unscented jojoba facial scrub (and used exfoliating glove for any extra spots - I didn't really need it, but I wanted to make sure I had the smoothest possible skin to work with!)
- Applied Facial Primer/Day Moisturizer
- In the afternoon I gave my face just a quick wash with black charcoal soap and reapplied the facial primer before diving into my makeup routine! I might share that on the blog in the future ;)
Tuesday, August 16
Batty's Bath Natural Laundry Soap is Here!

Washing machines REJOICE! Batty's Bath Natural Laundry Soap was JUST released in the BattysBath.com shop!
The seasonal pick for fall is PUMPKIN SPICE!
The regular lineup for laundry soap is:
*Lemon Lime
*Chamomile Meadows
*Unscented.
Wednesday, June 22
How To: Natural DIY Hair Gel
 I recently got asked on the Batty's Bath Facebook Fan Page about natural hair styling products. I wont be adding any to the Batty's Bath line any time soon because they are super easy for you to make at home! This natural hair gel is so easy to make I almost didn't think it was worth a whole blog post lol! But, since it's not common knowledge and makes a great gift for those hard to buy for boyfriends, husbands, brothers, and dads, I couldn't help but share it here! Bookmark this post so when you get stuck for what to get those dudes for their birthdays or Christmas you'll have a quick and easy solution! :)
 It's interesting to note that this recipe is versatile and rich in omega 3s - omega 3s encourage hair growth! Another interesting point is that the flaxseeds you'll use in this recipe are the same thing that many companies use in their products and it's what flappers used in the 20s to create that pin-curl look!
Enough with introductions though, let's get to the recipe...
NATURAL DIY HAIR GELL
What you'll need:
- Ground Flaxseeds
- Water
What to do:
- Boil 1 cup of water
- Add 1-2 tablespoons of flaxseeds
- Mix
Tada! You're done! I told you it was super easy! You just created a frothy gel-like consistency that makes for a nice, strong hold (plus sexy shine) hair gel!
Monday, June 13
Parabens - How to spot them on labels
 In the past I've talked about what parabens are and explained why all of my products are paraben free but I feel it's worth repeating. The point of this post isn't to just repeat a post I've written previously, but instead, I'm going elaborate on my previous post by including how you can spot parabens by reading the labels on your favorite beauty products.
 First, let's do a quick review....
Parabens are preservatives used in over 70% of all beauty products. This is why you NEED to know how to spot them because you can bet that if you've bought something from the drug store, mall or department store lately, there's a good chance it has parabens in it.
Why you should avoid them
- one study showed that they can age the skin with exposed to UV light
- another study showed that they mimic estrogen
- they have been found in breast tumor tissue
- contrary to what was previously thought, they can penetrate the skin and migrate into body tissue
Now let's learn how to spot them!
If you have never read an ingredients label on a beauty product before, now is the time to start. When you do - don't freak out! If it's a commercially made product, the ingredients list is going to be HUGE with super long unpronounceable words, but I'm here to help you out! There's lots of things to look for on ingredients list, but we're going to start with baby steps and ease into things. If there's anything I've learned from my university years, it's don't try to learn EVERYTHING all at once. Instead, start with something that's manageable and build your knowledge bank from there. Today we're going to start with parabens.
The great thing about starting with parabens is that they are pretty easy to spot on a label because the name of the ingredient generally ends with "paraben"! Parabens aren't awesome but it's awesome that some of the most common ones include the word "paraben"! There are a few that are a bit tricker to spot but thankfully the list of incognito parabens is short
Here's the most common parabens you'll find on ingredient lists:
- methylparaben
- ethylparaben
- isobutylparaben
- propylparaben
- ... (other variations ending in paraben can be spotted as well)
- hydroxybenzoic acid
- hydroxybenzoate
There you have it! Go grab the products you use everyday and check out those labels! You'll be glad you used your new label reading skill to protect you and your family!
Stay tuned to the blog or join the mailing list for more "ingredient spotting baby steps" you can take!
Tuesday, June 7
What You Need to Know About Sunscreen
 The signs of summer have certainly shown themselves lately. Over the past few weeks I've been asked more times than I can count about natural sunscreen; mainly, "Do you make natural sunscreen or know where I can get a good natural sunscreen that isn't gross?"
After a lot of consideration, a discussion the fan page, and mulling it over with a close friend, I've decided NOT to make natural sunscreen, at least not for sale. I'll be making it for myself and my fiance, but I decided not to offer it for sale mostly because of the regulations AND my fear that with a natural sunscreen in hand some people will throw everything they know about being "sun safe" out the window. That scares me more than anything!
So if you can't get a natural sunscreen from Batty's Bath, what should you look for? Well, I'm going to answer that question by informing you on what to look for in a natural sunscreen and what to watch for (i.e. run away from)! There's a few ingredients in "chemical" sunscreen, and sunscreens claiming to be "pure" or "natural" that you need to learn so you can steer clear of them! Let's get started...
First up, the good guys...
When looking for a natural sunscreen look for ingredients that protect you from the sun by physically blocking & deflecting the sun's UVA and UBA rays. These include zinc oxide and titanium dioxide. One thing to note though when looking for sunscreen with either of these two natural ingredients is making sure that they are not used in nano form. What does nano form mean? Well Nanoparticles are very controversial right now. It refers to the size of the actual minerals and at the smallest size, they can penetrate the skin easily. Because of this, some experts are concerned about particles entering the body and accumulating in body tissue or getting into place they shouldn't be (for example, your cells). So what do you need to now to avoid purchasing a product that could have nanoparticles? First you need to know that you want the particles to be larger than 100 nanoparticles. If the packaging or description doesn't say, ask!
Next up, the bad guys.....
This is not one of those times when going after the "bad boy" isn't as exciting as it was when you were teenager! In fact, playing around with these "bad boys" can have much more serious effects than a good cry over a tub of ice cream! This group of ingredients are found in chemical sunscreens and protect you from the sun by absorbing UV rays before they have a chance to damage your skin. When looking for this list of bad boys, check out any products with "SPF" on the label, especially if they don't mention that it is a mineral or physical blocker that's protecting you. So who are the bad boys? Without further ado, here's how you'll find them on an ingredients list: padimate-O (PABA), benzophenone (oxybenzone), homosalate, and octylmethoxycinnamate (octinoxate).
So what makes these ingredients so bad?
First, padimate-O (PABA) is a physical blocker (not a bad thing) but it is also a suspected carcinogen. Second, Oxybenzone (benzophenone) has shown endocrine disruption in animals, although the relevancy of this finding is debated as some experts claim that it doesn't enter the human bloodstream in any meaningful way. Third, the remaining ingredients are suspected of messing with hormones. Yikes!
So why care about the effects of the sun in the first place?
According the Canadian Cancer Society, "Natural sunlight is important for good health. But too much exposure to the sun’s rays can cause skin cancer and eye problems. Being safe in the sun can go a long way in protecting yourself and your family. There is no safe way to get a tan. Tanning beds and sun lamps are not a safe alternative. The more you use tanning beds and sun lamps, the greater your risk of getting skin cancer." - Canadian Cancer Society Website.
So we're not talking about the difference between being pretty in pale, and being tremendously tanned, ... we're talking about keeping you safe from too much sun exposure that causes skin cancer! If you haven't taken this seriously in the past, this is the year to start!
Hoping to see all you lovelies the same shade this summer as you were this winter ;)
Wednesday, April 27
How to Make Your Own Natural Air Freshener
A little while ago I was asked if Batty's Bath offers natural air fresheners, which we don't. Why? Because making your own is so super easy anyone can do it! Today I'll tell you exactly how!

What You'll Need:
- Candle Warming Plate (available at most craft stores & where candles are sold)
- Old candle glass jar or tea cup
- Candle wax (most local craft stores have a variety of different waxes)
- Essential Oils (check your local health food store) - my fav of the moment is lemongrass
What to Do:
- Place the old candle glass jar or tea cup on the warming plate and turn it on.
- Cut the wax into cubes - enough to fill your jar or tea cup 3/4 full.
- Place the wax cubes into the glass jar or tea cup
- After the wax has melted, add your favorite essential oil(s) as well as more wax if needed
- Before long the scent of the oils will fill the room (and possibly your house!)
- The amount of time this will last will depend on how big your jar/cup is and how much essential oils you put in. You can add more essential oils as you need them - the wax will last for a LONG time! I haven't changed mine in 6 months!
Tuesday, April 26
5 Reasons to Buy Handmade Soap
5 Reasons to Pamper Yourself with Handmade Soap!

1. You value the largest organ in your body - your skin - and know that without the 3000 square inches of skin on your body, you wouldn't survive. It's definitely worth taking care of!
2. You don't want to have your skin rough, red, and dry after a shower or bath! You know that industrial manufactured soaps have harsh chemicals & detergents that cause just that! How? These harsh ingredients strip your skin of its natural moisturizers, irritate may people's skin, and even CAUSE may common skin problems!
3. You love that handmade soap is free of harsh ingredients and instead is made with natural oils, butters, and clays in particular combinations for various skin types! It's designed with specialized skin care in mind - not profits or bottom lines!
4. You LOVE Glycerin and each and every bar of handmade soap contains loads glycerin. Why do you love glycerin so much? Because glycerin draws moisture from the air into your skin! Is your skin craving moisture? If you're using industrial manufactured soaps you can bet it is because the glycerin is removed from these soaps and sold off for profit! Since the glycerin is removed from these industrial manufactured soaps, they replace that skin loving glycerin with poor quality fillers and detergents
5. You value affordable luxury and know that the simple things in like bring the most joy! Using handmade soap is like treating your skin to some serious pampering everyday! If you ever wanted to feel totally pampered on a small budget, handmade bath & body products are the way to go!
Share
Wednesday, March 30
Alternative Uses for Vodka

Treat Poison Ivy
For many, one of the hazards of enjoying the great outdoors is an encounter with poison ivy, oak or sumac. It can lead to a nasty, long-lasting rash. Unfortunately, poison ivy is spreading, thanks to global warming. To avoid the uncomfortable reaction, immediately pour vodka on skin that has come into contact with poison ivy, and the alcohol will wash away the itchy culprit, urushiol oil. Some have said that the vodka needs to be at least 100 proof to work. Others have argued that straight rubbing alcohol works better.
Freshen Laundry
You can keep your clothes smelling fresher with vodka — really! Simply spritz your duds with the stuff, then hang to dry in a well-ventilated area. (Do a spot-test first to be safe.) Vodka kills odor-causing bacteria, but doesn't leave a scent when dry.
Shine Your Fixtures
Moisten a soft, clean cloth with vodka, then apply a little elbow grease.
Preserve Flowers
If vodka can help you find love, then it can also help you preserve it — or at least the symbols of it. Add a few drops of vodka and a teaspoon of sugar to the water in your flower vase. It should help keep your flowers fresh longer. Change out the mixture with fresh ingredients daily.
Repel Insects
Who knew that vodka can kill pesky insects? Pour a little of the saucy spirit in a spray bottle and squirt on the little buggers, or yourself as a repellent. But please don't take aim at any beneficial bees!
Soothe Jellyfish Stings
For vegetarians and others who don't travel with meat tenderizer (or who don't feel comfortable asking friends to, um, relieve the pain), take heart. Vodka can also disinfect and alleviate some of the bite of a jellyfish sting. (Batty Bite: When I was younger I was stung by a jelly fish but we were told by the lifeguard to rub sand on it. It was way too long ago for me to remember if it actually worked but I do remember the sting being very painful!!!)
Clean Away Mold
Fill a recycled spray bottle with some bottom-shelf vodka. Spritz on, then let sit for 15 minutes. Scrub away with an old toothbrush
Make a Soothing Lavender Tincture
Do you find the scent of lavender soothing? Did you know that herbalists have used it for generations to naturally ease aches and pains? Here's a fun DIY tip: Fill a clean glass jar with fresh lavender flowers, then top off with vodka. Seal the lid tightly and place in the sun for three days (same idea as making sun tea!). Strain the resulting liquid through a coffee filter, and poof! You have a homemade tincture to rub into aches and pains. You can pour into smaller bottles, decorate them and give them as unique gifts.
Ease a Toothache
Got a toothache? Your first priority should be to see a dentist. But sometimes you can't get an appointment right away, or the professionals tell you it will just have to heal on its own. In that case, try swishing a shot of vodka over the affected area. It can help disinfect, and should numb some of the pain in your gums. Just beware that your honey may accuse you of smelling like a saloon. Share
Monday, March 21
Borax or Baking Soda Instead
 If you're looking for an affordable "greener" way to clean, then look no further than how your great grandmother probably cleaned! I'm a huge fan of baking soda - I use it for just about everything, but sometimes Borax is also good substitute! Borax is chemically different from baking soda, but the two products share many uses. Both are useful for household cleaning in the kitchen and bathroom and to freshen laundry. Both are also eco-friendly and all-natural alternatives to commercial cleaning products. One difference between baking soda and Borax is that while baking soda is necessary in many cooking recipes, Borax is not suitable for consumption--do not eat Borax!!! This is why I prefer baking soda - I have pets and don't want to use anything around them that could harm them.
Borax and baking soda both have an extensive list of uses! I wont list them all here because there are simply too many (especially for baking soda!) but I will give you links to find out great uses for both!
Here are a few of my favorite tips for Baking Soda:
- Dry clean carpets and upholstered furniture by sprinkling baking soda over the fabric and gently brushing it. Leave it for an hour or overnight, then vacuum.
- Boost your laundry detergent’s cleaning power by sprinkling a handful on dirty clothes.
- Use it to get rid of stale odors from cooling containers and thermos bottles... and just able everywhere else!
- Relieve skin itch from insect bites and pain from sunburn.
- Turn baking soda into modeling clay by combining it with one and 1/4 cups of water and one cup of cornstarch.
Tuesday, March 15
Getting Green for Saint Patrick's Day!
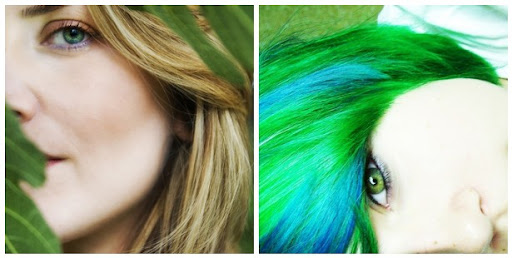
How are you going to show your green side this Thursday? Will you be a natural green beauty or will you be taking a funkier approach? Either way, as long as you're happy, well, and spending St. Patty's day with loved ones, you're sure to out shine any shimmering shamrock that comes your way! As I write this post I have a bit of green in my hair but I might have to touch it up before Thursday :) I'll have to check if I have any green dye kicking around here.
Photo Credits: 1. 02-green eyes, 2. i feel like tarzan.
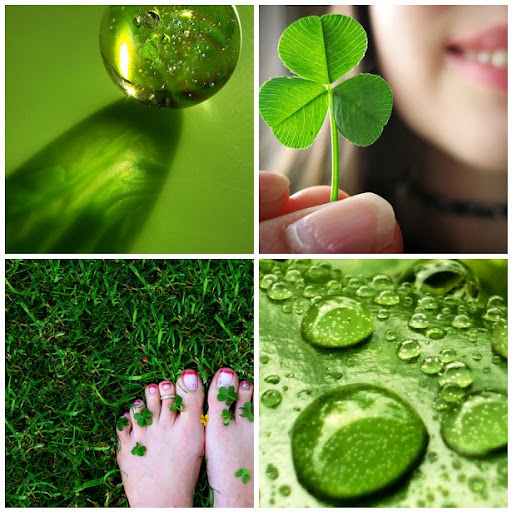
Not only is it a great time to celebrate the color green, it's also a great time to celebrate spring! Green gives me a calming, back-to-nature feel that is a welcome change from the grays, dull blues, and whites from the winter. Not that I don't like those colors! I'm just ready for a change - I'm sure I'm not the only one either ;)

Lastly, if you're looking for something crafty to do before Thursday, why not make this guy? I'm sure he'll bring the luck of the Irish to your celebrations and a few smiles too :) You can get him here.
Monday, March 14
Easy Green & Natural Polisher You Can Do at Home!
 Although I've never tried it myself, I've read that pineapple is natural skin polisher that comes with a clinical proof of efficiency! Apparently, just rubbing your skin with a slice of pineapple works magic on dilated pores and minor skin flakiness.
 So what is it about pineapple that makes it so special? Bromelain! Pineapples have an abundance of this enzyme that is clinically used as a skin debrider (dead tissue remover) when treating burns.
Additionally, I found out that in a study done by the University of Honolulu, the researchers found that bromelain interferes with growth of malignant cells (essentially slowing down the growth of these malignant cells ) while also decreasing inflammation! Now that's some sweet stuff :)
Thursday, January 20
How to Clean Your Makeup Brushes and Clean Your Windows!
 You're going to LOVE this post! After reading this you'll know how to make your own green cleaner for your windows that doubles as a mild cleanser for your makeup brushes!
What You Need:
3 tablespoons of vinegar
1/2 teaspoon of biodegradable liquid soap (like Batty's Body Wash or Shampoo!)
2 cups of water
The Method:
Mix all ingredients together and place in a trigger action spray bottle - Voila - you have a non-toxic, vinegar-based window cleaner. It also makes quick work of lime scale in those difficult-to-get-to areas in the bathroom. And as a bonus, vinegar is a natural deodorizer and disinfectant.
For Your MakeUp Brushes:
- Run the bristles of the makeup brush under warm running water.
- Apply a small amount of the above mixture to bristles and work into a light lather.
- Rinse bristles thoroughly under running water. You will notice that the water leaving the brush is tinted from old makeup.
- Continue rinsing until no color leaves the brush.
- Allow it to air-dry.
Wednesday, January 19
DIY Natural Green Cleaner

If you've been taking steps to have a "green home" you've no doubt wondered about natural green cleaners! In this post I'll share a great recipe for a green cleaner that you can make today because you probably already have all the ingredients! What some more good news? This recipe is non abrasive, non-toxic and does not damage surfaces.
What You Need:
1/2 Cup of Baking Soda
Now What?
Mix ingredients together and use to clean your bath, sink and toilet surfaces
Sunday, January 9
Recycled Drawers for Small Space Gardening
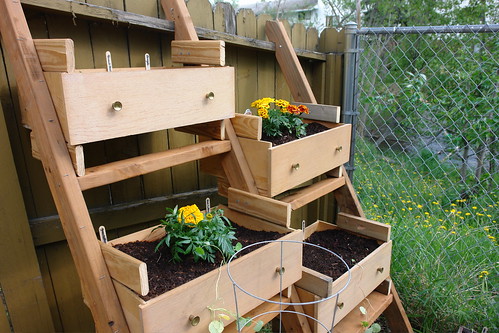
I love this idea! Small space and urban gardening has always fascinated me and stumbling upon pictures like this really inspire me!
ShareSaturday, August 21
New Release: SLS Free Body Wash, Shampoo, and Conditioner
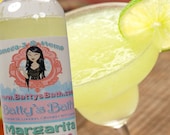
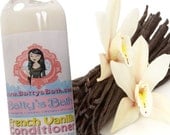
I'm super excited to announce my newly formulated
Body Washes, Shampoos & Conditioners!
Now they are all free of SLS, Phosphate, BHA, BHT, Parabens, DEA, MEA, TEA, Dibutyl Phthalate, Formaldehyde-releasing Preservatives, PEG compounds and Siloxanes!
The old formulas were free of most of these ingredients but I decided to make the full leap into making liquid formulas that are free of SLS.
So what does all this mean to you?
It means that Batty's Bath products are even more
skin loving, eco-friendly, and natural than ever before!
Enjoy the new formulas loaded with
Hemp, Aloe, and Natural Botanicals!
Go to the online shop for more information on each product.
My newly formulated goodies have been flying out of my online shop and
out of my studio locally faster than ever before! I'll be adding new
scents daily so stay tuned and snatch up what you want FAST
before someone else beats you to it :)
Share
My newly formulated goodies have been flying out of my online shop and
out of my studio locally faster than ever before! I'll be adding new
scents daily so stay tuned and snatch up what you want FAST
before someone else beats you to it :)
Wednesday, June 9
Is There Really a Difference Between Handmade Soap and Commercial Soap?

There was a time when I wondered if there was much of a difference between handmade soap and commercially made soap. I knew the handmade stuff made my skin feel better but I wasn't sure why.
Now fast forward a few years to present day! I now know the answer to this question first hand because I make soap for a living! I didn't start out making it as a business. No no no no.. things started out much simpler than that. I started out making handmade soap that both my fiance and I could use without any irritations - rashes for him, dry itchy and cracked skin for me (my feet were the worse! ouch!). I quickly realized that there is a HUGE difference between the soap I was making, and the stuff we had used for so long from the department store! ... In fact, after learning about what we had been slathering on our skin for so long, I was amazed that we didn't have more problems!.. the skin sure can put up with a lot - the good news is it doesn't have to :)
Commercial soaps aren't actually "soap" - they are detergents. Detergents are made with stinky petroleum products and chemicals that are then heavily scented with perfumes (rather than fragrance oils or essential oils) to cover up the stink ... right away, this doesn't sound like what "soap" should be does it? If that wasn't bad enough many commercial "soaps" include animal fat (unused by-products that are obtained cheaply from the meat industry). If you're a vegan or vegetarian like I am, you've already decide that this is a bad thing, but for the meat eaters out there (like my fiance), you may be wondering why you need to worry about animal fats in "soap". The problem with this is that there are substances in this fat (beef tallow) that can't be broken down (saponify) and can cause skin irritations and break outs. Moreover, there has been a lot of controversy over the hormones, antibiotics, and other chemicals that these animals are subjected to that consequently end up on the dinner table - so shouldn't we also be concerned with these same chemicals ending up in our bath & body products that we rub all over our skin? I think so.
So now that you know a bit about what commercial "soap" (aka detergents) are, let's look at the handmade alternative! True soaps... like the handmade kind, are made with natural products, in my case, natural vegan products - glycerin, olive oil, shea butter, etc. All of the ingredients in true soaps are there for a reason; that means there's no fillers and no perfumes to cover up a stinky sorry excuse for soap lol! On the eco side of things, true soaps are made with very little energy, don't create by-products that fill up landfills and don't poison the earth with the suds that go down the drain. In fact, all those suds are biodegradable! There's no need to worry about true soap causing harm when they are made, while they are being used, and after they are gone down the drain!
One of my mottos that I try to live by is to tread lightly. Each day I work closer and closer to reducing any negative marks my fiance and I may be leaving on this planet. I truly feel blessed and accomplished to be able to make true soap for my friends and family as a way of life. If there's one thing you can do for me after reading this blog post, it's to tell someone else about what you've learned so we can all tread lightly together :)
Tuesday, April 27
The Hippy in Me
 It's true, I'm just a hippy at heart. This treasury is entitled "Bring out the hippy in me" and was inspired by my love of all things green, eco-friendly and natural. Yes, my style is very gothic inspired, but my beliefs are green, green, green :) Like Kermit said, it's not easy being green!
Share
It's true, I'm just a hippy at heart. This treasury is entitled "Bring out the hippy in me" and was inspired by my love of all things green, eco-friendly and natural. Yes, my style is very gothic inspired, but my beliefs are green, green, green :) Like Kermit said, it's not easy being green!
Share
Subscribe to:
Posts (Atom)




 Posts
Posts


